This post contains affiliate links, meaning I may earn a commission if you click through and make a purchase. As an Amazon associate, I earn from qualifying purchases. This comes at no additional cost to you. I only recommend products or services that I believe will provide value to my readers based on personal experience or thorough research.
In animation, storyboarding is where everything truly begins. Before characters move, before dialogue is recorded, and before a single frame is animated, the storyboard lays down the visual backbone of the story. It’s the bridge between script and motion, turning ideas into clear, readable sequences.
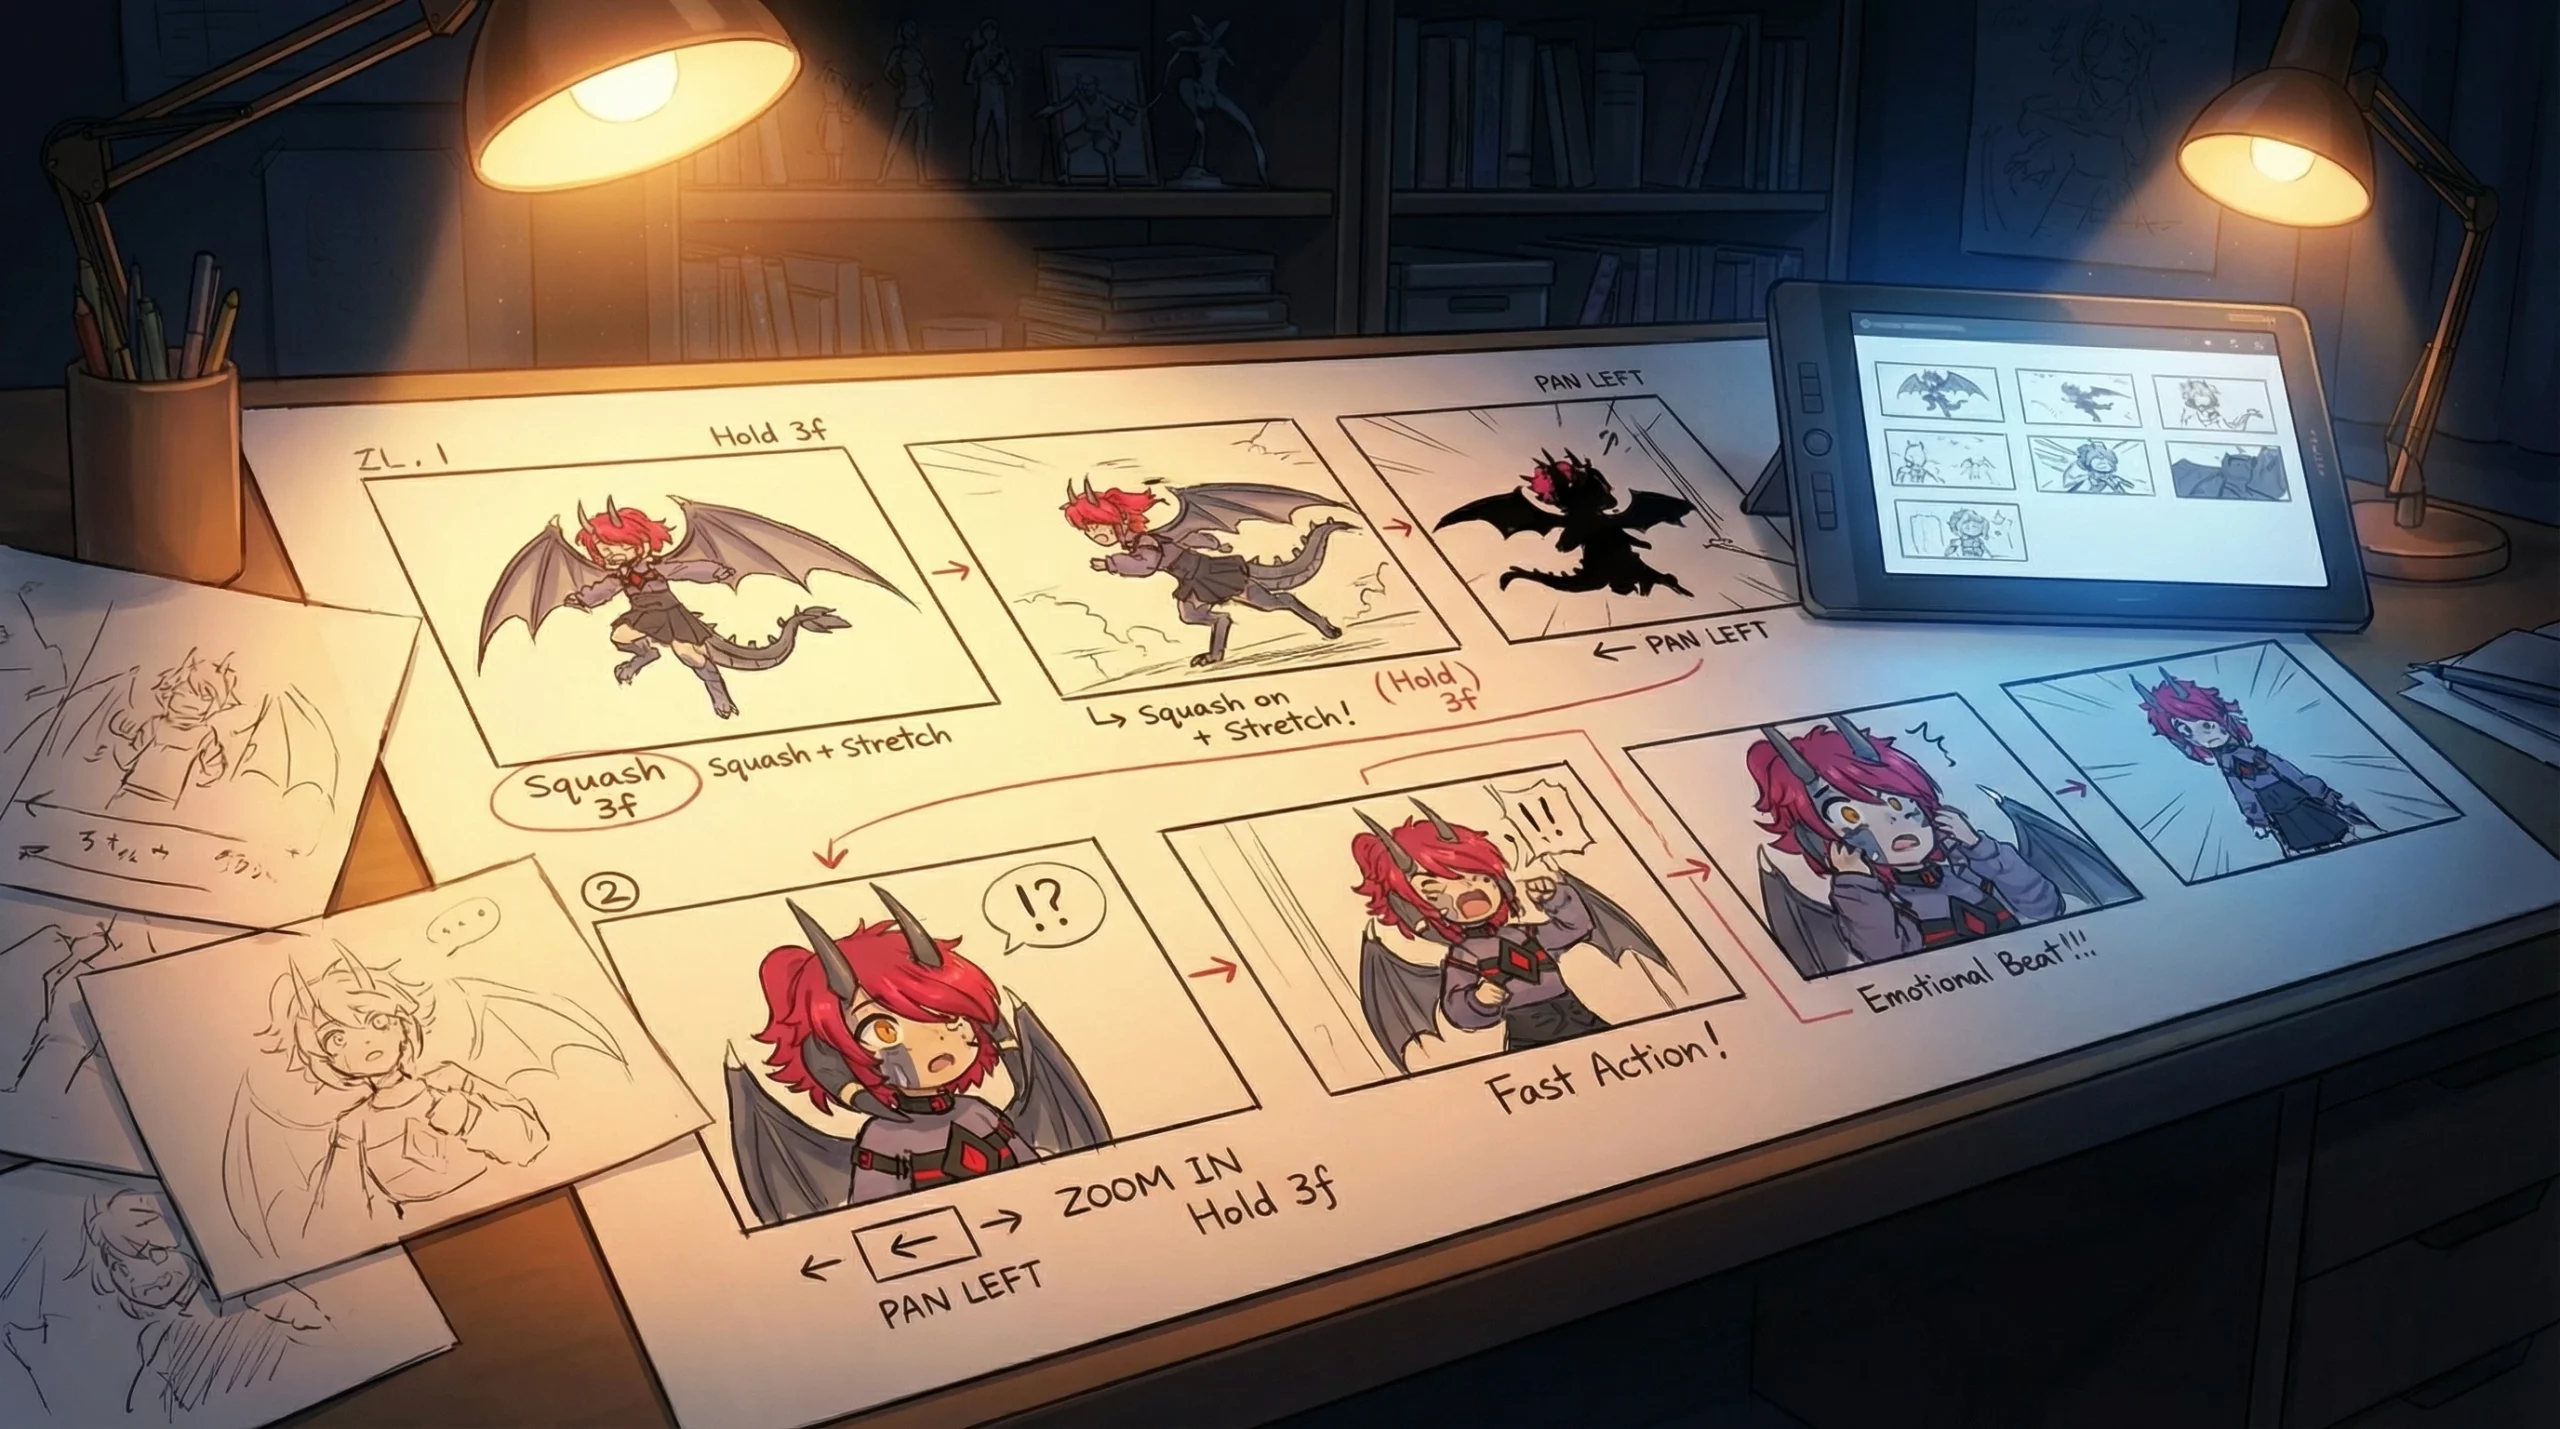
Think of an animation storyboard as a moving blueprint. Each panel captures framing, camera movement, acting beats, and emotional timing. Without it, animation risks becoming expensive guesswork instead of a controlled creative process.
Why Storyboarding Is Essential for Animation
Animation is built frame by frame, which means mistakes are costly. Storyboarding allows animators and directors to plan pacing, staging, and transitions long before production begins. This keeps teams aligned and prevents wasted effort later in the pipeline.
Strong storyboards help solve problems early. Awkward cuts, unclear action, or emotional beats that don’t land can all be fixed on paper instead of during animation. It’s faster, cheaper, and far more flexible.
Tools for Animation Storyboarding
Many animators still start with pencil and paper. Rough sketches keep things loose and focus attention on motion and storytelling rather than clean lines. This approach is especially useful during early ideation and pitch stages.
Digital tools, however, dominate modern animation workflows. Software like Storyboard Pro allows for camera moves, timing notes, dialogue placement, and easy revisions. These tools are ideal for teams, remote collaboration, and tight production schedules.
The best tool is the one that helps you communicate clearly. Whether analog or digital, storyboards should prioritize clarity, rhythm, and intent over polish.
How to Create an Animation Storyboard
Start by understanding the purpose of the scene. What needs to happen emotionally and visually? Once that’s clear, sketch key poses and camera angles that communicate the action.
You don’t need detailed drawings. Simple shapes and strong silhouettes are enough as long as the movement reads clearly. Each panel should show progression—something changes from frame to frame.
Include notes for timing, dialogue, sound effects, and camera direction. These details help animators, editors, and sound designers stay in sync throughout production.
Best Practices for Animation Storyboards
Clarity always comes first. If someone unfamiliar with the project can follow the story just by looking at the boards, you’re on the right track. Avoid overcrowding panels or overexplaining with text.
Use composition and camera language intentionally. Wide shots establish space, close-ups highlight emotion, and dynamic angles add energy. These choices shape how the audience experiences the animation.
Iteration is part of the process. Storyboards should evolve as the story improves. Revising early saves time and leads to stronger final animation.
FAQs
Q: What is storyboarding in animation?
A: Storyboarding in animation is the process of planning scenes visually through sequential drawings that show action, camera movement, and timing.
Q: Why are storyboards important for animation?
A: They help plan pacing, staging, and storytelling before animation begins, saving time and preventing costly mistakes.
Q: Do animation storyboards need detailed drawings?
A: No. Clear poses, strong silhouettes, and readable action matter more than clean or detailed artwork.
Q: What software is commonly used for animation storyboards?
A: Tools like Storyboard Pro are widely used, though many animators still sketch traditionally before moving digital.
Q: Can storyboards change during production?
A: Yes. Storyboards are meant to evolve as the story improves and creative decisions are refined.
Leave a Reply